Pivot-top Game/Coffee Table. Part 3.
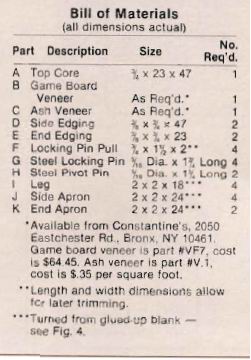
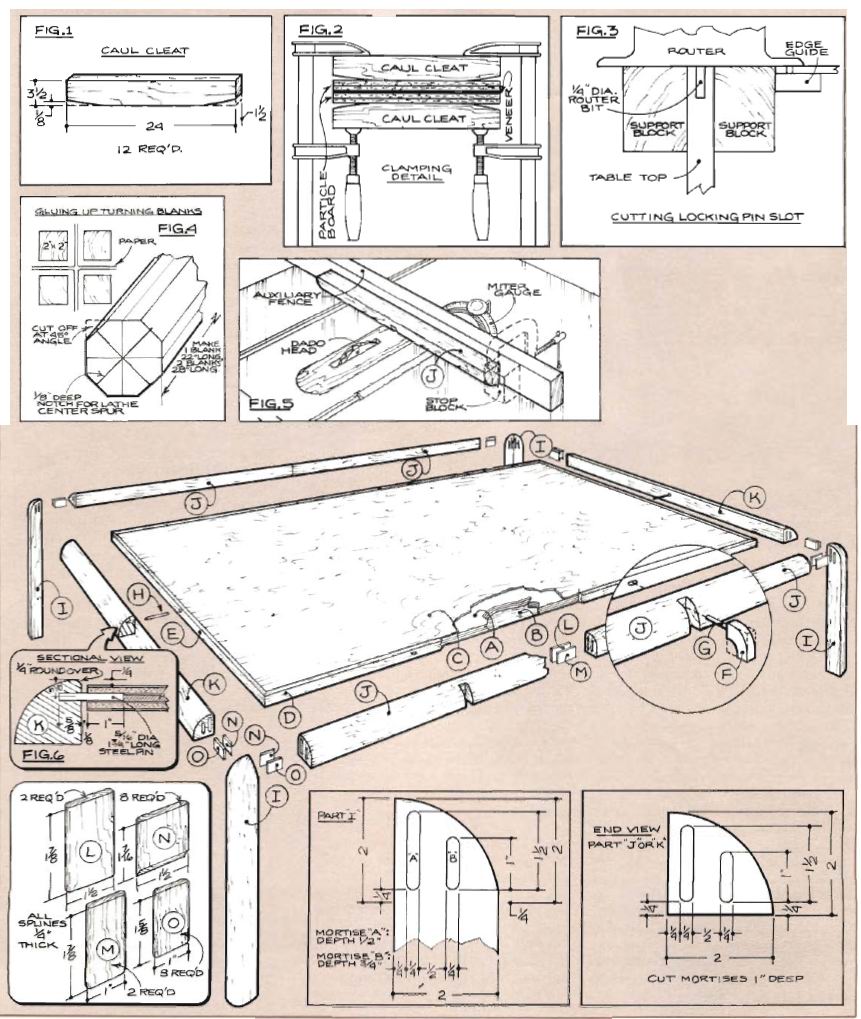
Once again, lay two of the particle board pieces on the workbench and cover with wax paper. Place the flattened game board on the wax paper, good side down, then place the plywood on top and align the edges. Now lay the ash veneer (C), good side up, on the plywood, again aligning the edges. Add more wax paper to the top, then use the caul cleats to apply clamp pressure. Apply the center cleat first and work toward each end with the remaining cleats. It’s important to apply pressure to as much of the surface as is possible, so if you have any C-clamps saw can be used to rip the opposite edge. If your table saw can’t crosscut 24 in. wide stock, you’ll need to use the router to make the end cuts.


The side (D) and end (E) edging can now be added. Cut the stock wider than necessary so that after edge gluing it can be planed and sanded flush to the top.
Lay out the location of the 5/16- in. wide slotted holes on the sides and the 5/16 in. diameter hole on each end. We used a router equipped with a 1/4 in. bit to cut the 5/16 in. slot (see Fig. 3). As shown, two support blocks of identical width are clamped to the top, flush with the edge. The edge-guide is added to the router so that it makes a cut 1/32 in. off center. One cut is made with the edge-guide bearing against the right hand support block, then a second cut is made against the left hand support block. The two offset cuts will produce a 5/16 in. wide slot. Start with the router bit set to make a 1/8 in. deep cut, then continue making 1/8 in. deep cuts until a depth of 1 in. is achieved. A 5/16 in. drill bit is used to cut the hole for the pivot pin on each end of the top.
When you use the hyperlink http://plasmir.ru required.