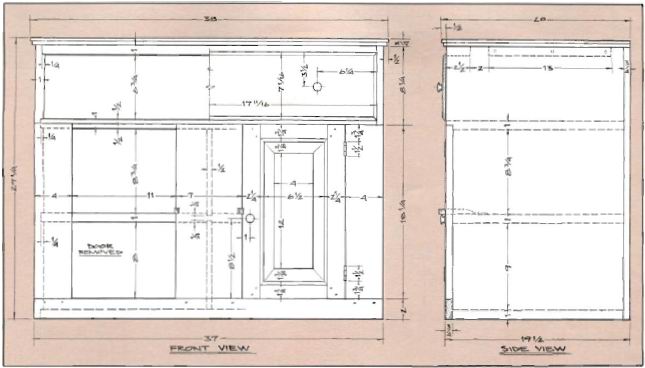
Shaker Single-Drawer Cupboard. Part 5.
With the panels cut, the doors can be assembled. Apply glue to the mortises and tenons then assemble as shown. The panels must be free to move with changes in humidity, so be sure not to glue them in place.
The drawer (parts T, U, V, and W) can now be made and assembled as shown. Note that the bottom is made using a 1/2 in. thick solid stock beveled on all four edges.
The top assembly (parts I, J, and K) can be completed next. Use the dado head cutter to cut the tenons on each end of part 1. Parts J and К are identical in profile except for the fact that part К has а 1/8 in. by 3/4 in. mortise to accept the tenon on each end of part I.
Note that the two rear dowel holes are slotted to allow movement of the top. Dry assemble parts К to using pipe clamps to hold everything in place. Lay out and mark the location of the front miters and bore three 1/8, in. dowel pin holes as shown. Remove the pipe clamps and separate the parts, then use a small round file to elongate the two rear holes. After cutting the miters, reassemble the parts and apply glue to the 1/8 in. diameter dowel pins, then drive them in place. Remember, only the pins are glued, not the mortise and tenon joint. Part J can now be mitered at the ends and edge-glued to the front edge of the top. The top assembly can now be joined to the carcase by driving screws up through the stretcher (B) and cleats (H).
The Shakers used a special latch (see latch detail) that’s not available today, so we’ve provided an alternative turn-button latch. One for each door is needed.
Final sand all parts finishing with 220 grit. If your cabinet is pine, you may want to apply a stain. We like Minwax’s Golden Oak Wood Finish. A good quality penetrating oil makes a good final finish.
When you use the hyperlink http://plasmir.ru required.

