Таble Saw Basics. part4
Choose a 1 x 6 x 16 in. piece of pine for the test cut and make the first cut (called a face miter) as shown in Fig. 6. Check for accuracy with a combination square. It should be perfect, but if it isn’t, repeat the procedure for adjusting the miter gauge.
Turn the miter gauge to the opposite 45 degree setting and make another test cut, using the right-hand table slot and again check the cut with the combination square.
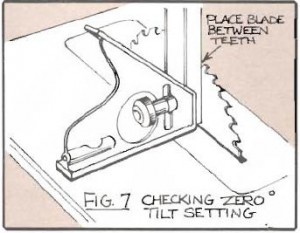
Now let’s check the blade tilt or squareness of the saw blade to the tabletop when the tilt scale (on the front of the machine) is set at zero. To do this raise blade to maximum height and place your square on the table so that the square blade rests against the saw blade between two teeth (Fig. 7). Make sure that the table insert is flush with the tabletop.
If the saw blade is evenly snug against the square, from tabletop to gullet between two teeth, lock the tilt handle and set the pointer to zero.
If the blade won’t incline to an exact vertical postion, there may be some kind of stop collar on the tilt screw under the table. Go to the rear of the machine and on the right end of the large tilt screw, look for a collar held by setscrews. Loosen the screws and rotate the collar to the right. Then bring the blade to vertical, lock it and rotate the collar as far left as it will go. Retighten the collar setscrews. part5
When you use the hyperlink http://plasmir.ru required.
