Таble Saw Basics. part3
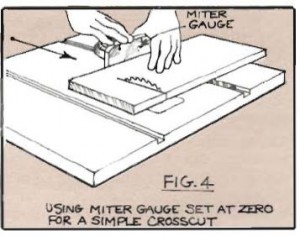
While holding the board firmly against the gauge, push the gauge with the right hand, feeding the work slowly and steadily until the cut is complete, then withdraw both the work and the gauge to the front of the table and turn off the motor. You have just completed a basic crosscutting operation used to trim a board to length across the grain at (we hope) 90 degrees to the edges (Fig. 4).
Check the accuracy of the crosscut using a combination square. If it’s not «right on the money,» reset the gauge as previously described and try again. If it’s still off and anything other than a perfect 90 degrees is unacceptable, go back and repeat the procedure for aligning the blade and table slot. Keep trying until you get a perfectly square cut. It’s very important to get it right.
The miter gauge must also be checked for accuracy of left and right hand 45 degree settings. To do this, set the gauge for 45 degrees on either side and lock it. Hold the gauge face firmly against the edge of a wide board which is flat and has a perfectly square edge. Scribe a pencil line on the board along the gauge bar, then check this angle by aligning the blade of your trusty combination square along the line (Fig. 5). If the square blade is perfectly parallel to the scribed line, adjust the pointer to exactly 45 degrees.
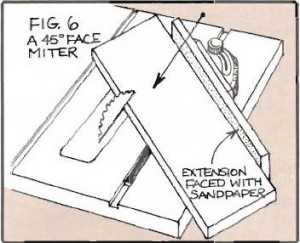
If the scribed line is out of parallel with the square, adjust the gauge setting one way or the other and keep checking until you get it right, then set the pointer at 45 degrees or scribe a permanent mark on the protractor to indicate this setting. Repeat the process for the 45 degree setting on the other side of the gauge. It’s a bit difficult to cut a board across its width at a 45 degree angle as the board will have a tendency to slide across the gauge face as it’s fed into the blade. In order to check our gauge setting by making an actual cut, we will have to make a simple fixture called a fence extension (Fig. 6). This is simply a 3/4 x 3 x 14 in. piece of flat stock fastened to the miter gauge fence with screws driven from the back. The extension is faced with medium grade sandpaper glued on. Even with this aid it’s necessary to hold the work firmly and feed slowly into the blade.
When you use the hyperlink http://plasmir.ru required.

