Таble Saw Basics
The purchase of that first new or used table saw is a momentous event for it indicates, by the outlay of cold cash, that you’ve committed yourself to more than just casual woodworking. Setting up and using a table saw for the first time can be a bit nerve-wracking for the novice who has had no previous exposure to such a machine. The purpose of this article is to help you get your table saw set up and properly adjusted so that you can proceed to basic operations with maximum safety and accuracy.
If you’ve got a new table saw, an owner’s manual should be included. This will show you the steps necessary to assemble and adjust the machine. Do not assume that because the machine is new it will operate perfectly when assembled. It must be adjusted precisely and then double-checked.
The procedures that follow apply to all table saws regardless of size and make. Your owner’s manual will give details on how to make specific mechanical adjustments. If you do not have a manual, you’ll have to do a bit of checking to see which screws or bolts to loosen in order to make various adjustments discussed here. Let’s take it step-by-step from the beginning.
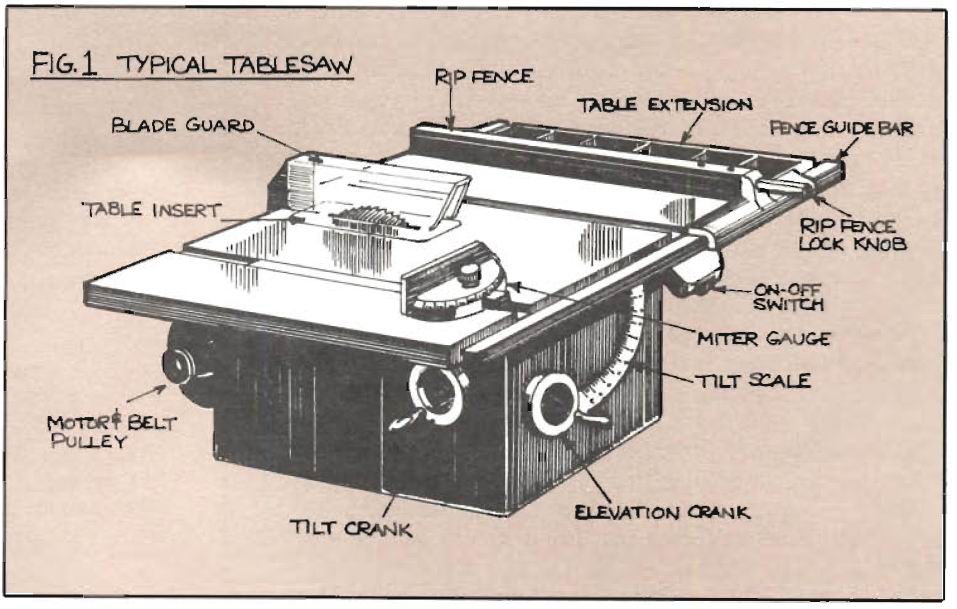
Fig. 1 shows a typical assembled table saw with accessories. Assuming you have assembled the saw and mounted it on a stand, it is important to unplug the power cord. This is always done when
changing blades or making major adjustments.
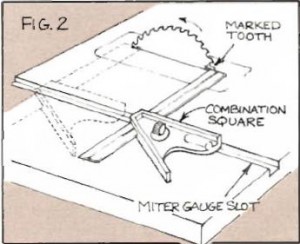
The first check is to ascertain if the blade is parallel to the miter gauge slots or, in other words, parallel to the table itself. Raise the blade as high as it will go with the elevating crank and, using a felt tip pen, mark one of the blade teeth nearest you which is set (bent) to your left. As shown in Fig. 2, place the head of an accurate combination square in the left miter gauge slot and adjust the square so that its blade just touches the tip of the marked tooth.
When you use the hyperlink http://plasmir.ru required.

