Таble Saw Basics. part2
Now slide the square to the rear of the blade (where it emerges from the table insert) and rotate the blade backward until the marked tooth again contacts the square. If the tooth doesn’t touch the square the same amount, the saw blade is obviously out of parallel with the gauge slots. To correct this, trunnion bolts underneath the table, which hold the entire tilt mechanism to the table, must be loosened so that either the front and rear trunnions or the table can be shifted slightly about the axis of the saw blade to bring the blade and table slots parallel. Repeat the check with the square and, if everything looks good, tighten the bolts carefully. After tightening, again check to make sure nothing shifted.
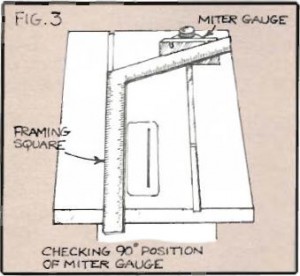
The miter gauge is checked next. We want to establish that when it is set at zero, the face of the gauge is exactly 90 degrees to the table slots and saw blade. As shown in Fig. 3, lay the long arm of a framing square against the side of a table slot. Hold the short arm flush against the face of the gauge and tighten the locking knob. The pointer on the protractor should now read exactly zero. If it doesn’t, adjust it.
The proof of the setting is the cutting so let’s try a simple crosscut operation to check things out. Lay an 8 or 10 in. wide length of 1 in. stock flat on the table with one squared edge against the miter gauge set in the left slot. Set your blade for zero degrees tilt, and elevate it 1 in. above the table. Make sure the blade is firmly fastened and the blade guard is in place, then turn on the motor. part3
When you use the hyperlink http://plasmir.ru required.
