Gate-leg table. part 3.
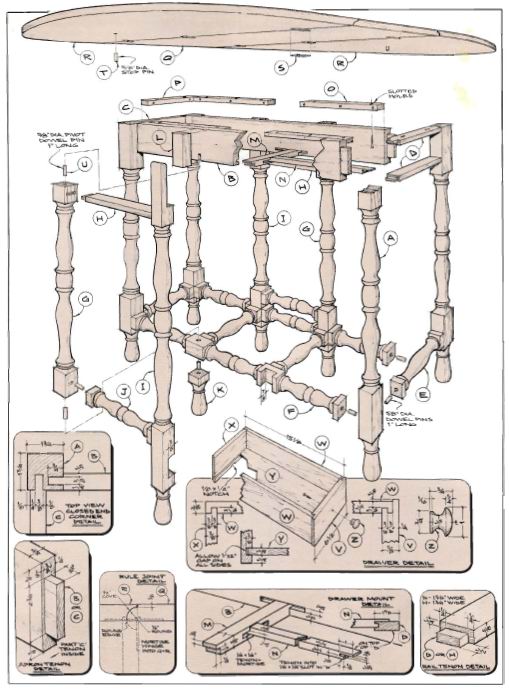
For the final assembly begin by making the two end frame and the two pivot leg assemblies. Also join the two side stretchers with the two remaining cross stretchers. Now join the end assemblies, the lower stretcher assembly and the side aprons to make the table frame. Note that the grooves in these side aprons, cut to accept the drawer guide support, are purposely cut oversize (long). This is done so the guide support can be angled into place after the table frame has been assembled. The drawer guide is also mounted at this time, although it should not be permanently glued until the drawer has been test-fitted for smooth opening and closing. A little paraffin on the guide will reduce friction and wear.
To mount the pivot leg assemblies first temporarily clamp the blocks (L) in place and drill the upper pivot pin holes. You will need to slightly tip the leg assemblies in order to mount them in the lower pivot pin holes. Glue on the blocks (L), locking in place the upper pins, and add the fixed feet (K).
The top is mounted with screws inserted up through slotted holes in the five cleats and the upper rail. Add the two leaves, using three hinges for each leaf, as shown, and glue in place the dowel pins (T), which serve as a simple stop for the pivoting leaf supports. Final sand the table and finish by hand rubbing three coats of tung oil into the wood.
When you use the hyperlink http://plasmir.ru required.

